When the northern lights are out, you don’t want to struggle with your camera settings. It’s best to know what to do before you head out into the field or to bring a northern lights photography cheat sheet with you.
Camera and tripod
You’ll need a camera with manual exposure control and a tripod. A remote release or a two-second self-timer or delay mode keeps your hand from blurring the shot when you press the shutter.
If you only have a smartphone, use the night photography setting. While a tripod may not be needed for cell phones, you may get better results using one.
Settings for northern lights photography
Start here:
- ISO 800-6400
- Aperture as wide as it opens — f/1.8, f/2.8, f/4
- Shutter speed: 5-20 seconds
These settings will vary based on how bright and close the northern lights are to you. Take a shot and check the exposure on the back of the camera. If it is too dark, raise the ISO or lengthen the shutter speed. Too bright, shorten it. Keep in mind that the LCD will look really bright in the dark; use the histogram to judge exposure for more accuracy.
Ideally, you’ll want a shorter shutter speed to help capture the structure in the northern lights. It’s much better to raise the ISO if it will keep the shutter speed shorter.
If the northern lights are really bright, you might end up with an ISO shorter than 800.

Focus
Ideally, focus on the stars. Find a bright star and magnify it to 100% on your LCD. Then manually focus until it becomes a pinpoint. I like to get to the pinpoint and then continue to slowly turn the focus ring until I go slightly past the pinpoint focus. Then I’ll reverse direction and bring it back to pinpoint focus. This allows me to know that I’m at the actual sharpest point.
You can also bring a bright flashlight and shine it on to a tree or item about 150 to 200 feet away. Use autofocus to focus on that point. After you get focus, switch your camera to manual focus.
Make sure to take a test shot and examine the stars at 100% to make sure they are in focus.
Composition
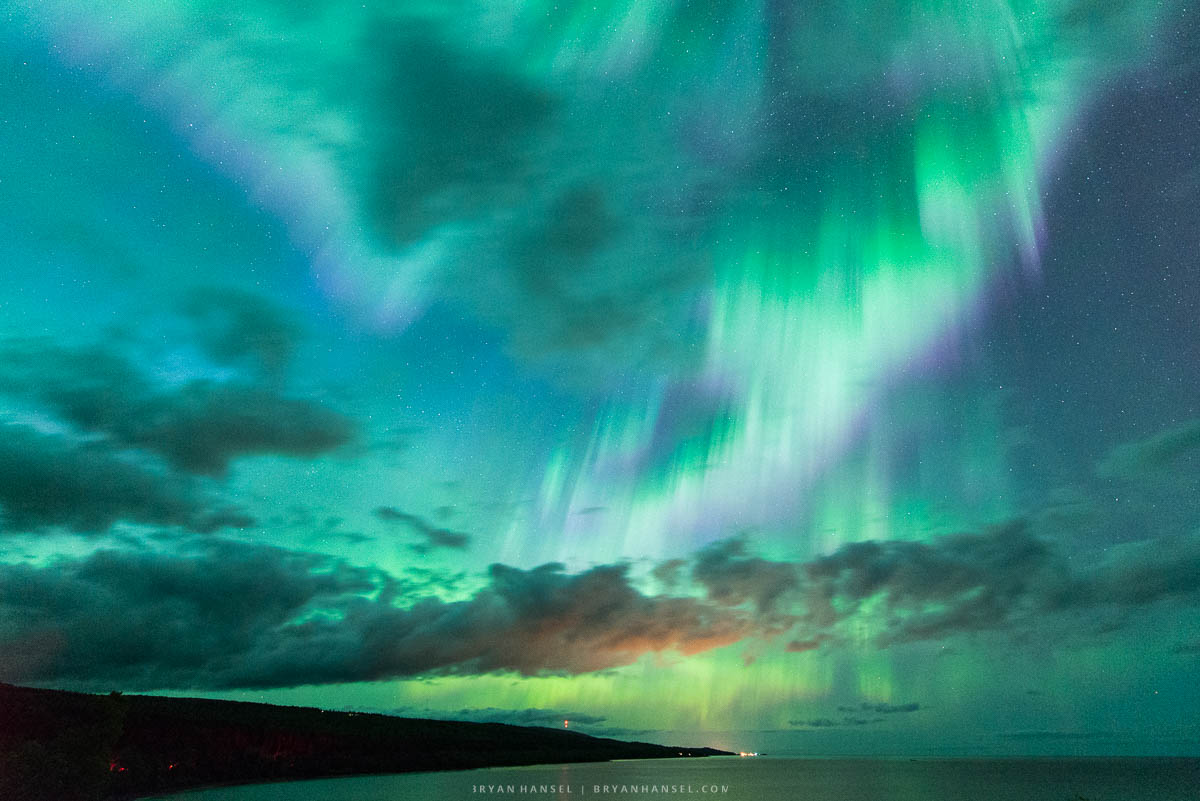
Instead of shooting directly up at the northern lights, you should put something in the foreground. Trees, a lake shoreline, mountains, or other earthly objects help connect the earth with the sky and can help provide scale. Around Grand Marais, a lake shoreline almost always works.

White balance
A white balance of around 5,000K often results in more accurate color, but shooting in tungsten or incandescent gives a cool blue to the image and looks great on the LCD screen. You’ll fine tune the white balance during processing to get it right.
RAW
Make sure to shoot using a RAW file type to give yourself the most quality and the most flexibility in editing. I offer Lightroom Night Sky Presets that work as a step-by-step workflow to help you edit your night sky images.
Take a workshop
I offer several night sky photography workshops and small group and 1:1 astro photography workshops that can help you learn northern lights photography.
Helpful resources
I have a Northern Lights Viewing FAQ that you can read about figuring out when they will be out. Spaceweather.com runs aurora forecasts and provides helpful tips. For aurora predictions and alerts on your phone, I recommend the Glendale app.

Leave a Reply