Panning is one of the most satisfying techniques in photography when it works; the subject remains sharp and frozen against a background streaked with motion blur. It communicates speed and energy in a way that a frozen action shot never quite does. It also takes some practice to get right, so don’t be discouraged if your first attempts are mostly blurry. Here’s how to do it.
What a Panning Shot Is
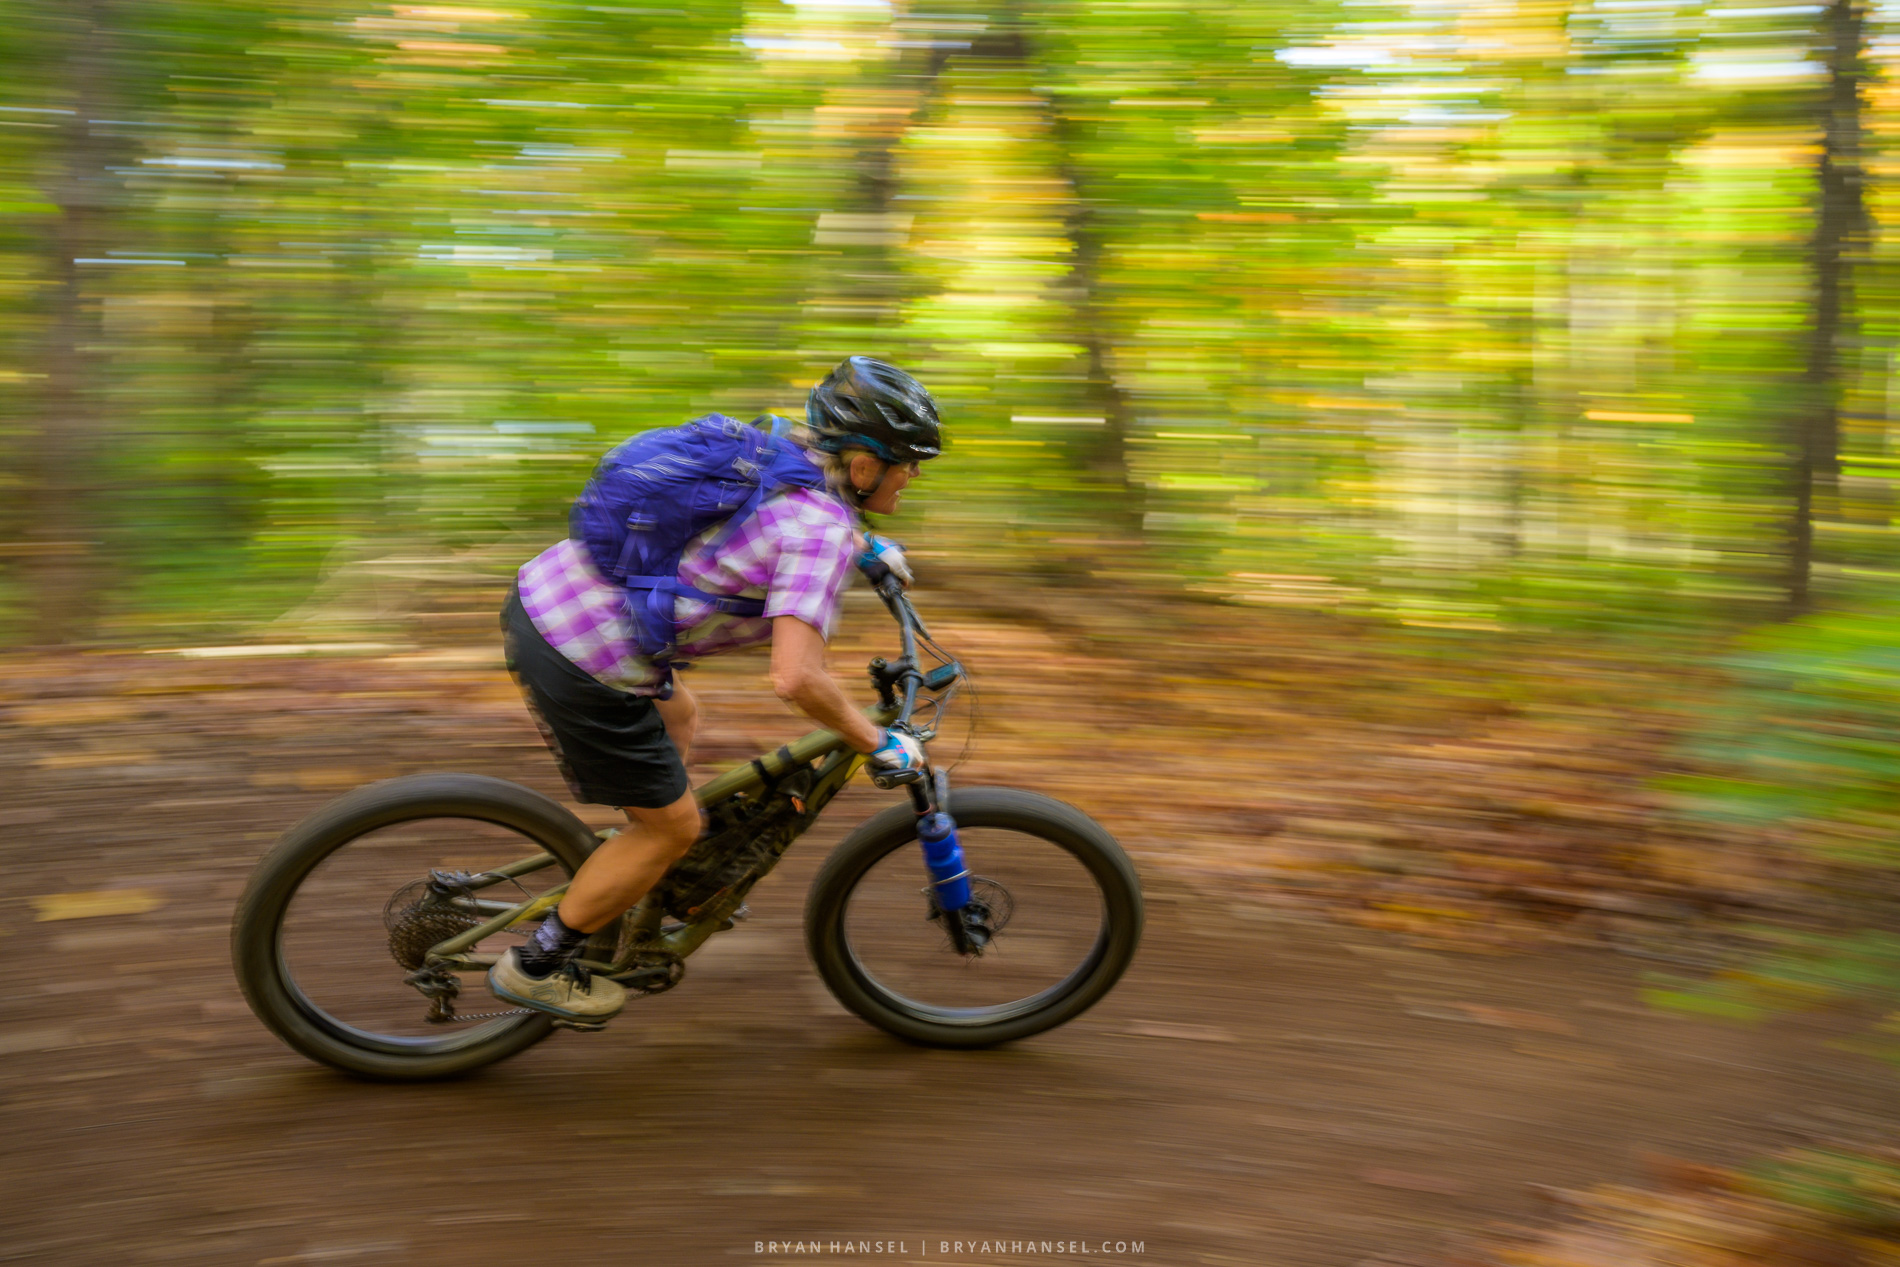
A panning shot is made by tracking a moving subject with your camera during a slow exposure. The camera movement matches the subject’s movement, which keeps the subject relatively sharp while the stationary background blurs into horizontal streaks. The result looks like the subject is moving fast even if it wasn’t.
It works with any moving subject, such as cyclists, runners, kayakers, cars, horses, dogs. Anything that moves in a predictable path at a consistent speed is a good candidate.

Camera Settings
The shutter speed is what creates the blur, and you need it slow enough to streak the background but not so slow that the subject goes soft too. The sweet spot is generally between 1/8 and 1/30 of a second. Start at 1/30 and slow down from there until you get the amount of blur you want.
To get a shutter speed that slow in daylight, you need to close down your aperture significantly. Set your camera to aperture priority and increase the f-number — f/11, f/16, or higher — until the shutter speed drops into that range. Pull your ISO down to its base level, usually ISO 100, to help get there.
If you’re shooting in bright sun and can’t get the shutter slow enough even at minimum ISO and maximum aperture, you’ll need a neutral density filter. A 3-stop ND will usually solve the problem. This is one of the situations where carrying an ND filter pays off.
Autofocus Settings
Set your camera to continuous autofocus, which is the mode that tracks a moving subject rather than locking focus on a single point. Move the autofocus point to where you plan to position the subject in the frame. Most of the time that’s slightly left of center, so the subject has space in front of them to move into. A subject riding toward the edge of the frame with nothing in front of them feels hemmed in. Newer cameras with subject detect work well and you don’t have to keep your autofocus point in one position.
Switch to continuous shutter release so the camera fires repeatedly while you hold the button down. You want multiple frames as the subject passes. With a slow shutter speed and a moving subject, your keeper rate won’t be high, and having five or six frames to choose from instead of one makes a big difference.

Positioning Yourself
Where you stand matters. You want to be perpendicular to the subject’s path. If they’re riding left to right, you should be standing directly to the side, not at an angle. The more directly perpendicular you are, the more consistent the subject’s speed appears to be across the frame, which makes tracking easier and the blur more even.
Get far enough back that you have a little room to work with, but not so far that the subject is small in the frame. For a cyclist, somewhere between 10 and 20 feet is usually right depending on your focal length.
The Pan Itself
Start tracking the subject before they reach your frame and pick them up early and build the rhythm of the movement before you press the shutter. The pan should feel smooth and continuous, like you’re swinging through a golf shot. If you start and stop, or if your movement is jerky, the blur will be uneven and the subject will go soft.
Check your results after the first pass. If the background isn’t blurring enough, slow the shutter down by closing the aperture further. If the subject is too soft, speed the shutter up slightly. It usually takes a few passes to dial it in.
Press and hold the shutter as the subject passes through your frame and keep panning after the shutter closes. Following through is important because stopping the camera the moment you fire will introduce movement at exactly the wrong time.

What Makes a Good Panning Shot
The background matters more than people realize. A plain background, such as a wall, a tree line, open water, produces cleaner streaks than a cluttered one. A busy background just looks messy when it blurs. When you’re choosing where to position yourself, look at what’s behind where the subject will be and pick the cleanest option.
Light direction helps too. Side light or slight backlight tends to separate the subject from the blurred background better than flat front light.
And give your subject somewhere to go. Leave more space in front of them than behind. A cyclist riding into open space feels like they’re going somewhere. A cyclist about to ride off the edge of the frame feels stopped.
One Last Thing
Panning is a technique that rewards repetition. The first time out you’ll probably get a handful of keepers out of fifty frames. With practice that ratio improves significantly. Find a location where the same subject passes repeatedly, like a bike path, a road, a running trail, and spend an hour working through the variables. By the end of the session you’ll have a feel for it that’s hard to get any other way.
Leave a Reply